
You must have seen my old posts on creating Drop down menu and drop down labels. Those blogger hacks were cool but since we should play with HTML codes to create Drop down menu and labels there it wasn't hassle free or lets say they were not that easy. So i am here with the easiest way to create Drop down menu. i am here with a page designed by hackosphere that can create Drop down menu by just entering title and URL. here's more about it.
This is the easiest Drop down menu creator i have ever seen. You can create your drop down archive or drop down labels anything by this tool.No, you shouldn't play with HTML codes nor you should edit your template. Just enter the title and URL and your drop down menu is ready for you. And another good thing is after you created your drop down menu you can put it in your blog with one click. See the screenshot below created by my own brother to understand it.
Back again with a blogger hack and this time with a coolest thing. You can see 'Show Table of contents' section in my blog now where all my table of contents will be loaded with one click. You can try it just to see what table of content looks like if you haven't seen it earlier. Well before starting to write about this blogger hack, i want to remember Hans of beautifulbeta who created this blogger hack as far as i know. Well, i am deriving his codes and hacks but i am trying to write in a much simpler way then him. So here is the process to create a Table of contents in your blog.
Table of contents helps your readers to find your posts easily. Just add some codes and all your posts are one click away from your readers.
Goto blogger 'Edit HTMl' page and search for the code <b:section> with id=main. This is the section which held blog posts. Now replace that line with the following code.
<b:section class='main' id='main' maxwidgets='2' showaddelement='yes'>
Now add the following CSS code to the head section of your template. This code is for the style of your table of contents. You can change this code according to your choice. The best place to add this code is just above ]]></b:skin> I am saying this place now because i was really confused about at which place of the head section should i put this code when i was creating my own Table of contents.
<style type="text/css">
#toc {
border: 0px solid #000000;
background: #ffffff;
padding: 5px;
width:500px;
margin-top:10px;
}
.toc-header-col1, .toc-header-col2, .toc-header-col3 {
background: #ffd595;
color: #000000;
padding-left: 5px;
width:250px;
}
.toc-header-col2 {
width:75px;
}.toc-header-col3 {
width:125px;
}
.toc-header-col1 a:link, .toc-header-col1 a:visited, .toc-header-col2 a:link, .toc-header-col2 a:visited, .toc-header-col3 a:link, .toc-header-col3 a:visited {
font-size:80%;
text-decoration:none;
}
.toc-header-col1 a:hover, .toc-header-col2 a:hover, .toc-header-col3 a:hover {
font-size:80%;
text-decoration:underline;
}
.toc-entry-col1, .toc-entry-col2, .toc-entry-col3 {
padding-left: 5px;
font-size:70%;
}
</style>
Now you are done with 'edit HTML' page. Now save the template and go to 'page elements' section.
Now click on 'add a page element' and then click on 'HTML/Javascript'. Now paste the code there leaving title blank.
<div id="toc"></div>
Now do the final step. Again add a new page element and click on HTML/javascript. Now paste the code there and keep the title 'Table of contents'.
<div id="toclink"><a href="javascript:showToc();">Show TOC</a><br/><br/></div>
<script style="text/javascript" src="http://home.planet.nl/~hansoosting/downloads/blogtoc.js"></script>
<script src="http://YOURBLOG.blogspot.com/feeds/posts/default?alt=json-in-script&max-results=999&callback=loadtoc"></script>
Change YOURBLOG with your own name and congratulate yourself for making your own table of contents.
This was todays blogger hack on creating table of contents. You can also try other blogger hacks like Adding Yahoo! emotion on your blog post or making your images tweak on blogger.
Okay, i told you earlier about What to do when you have nothing to post about. and Polishing one cool old post to make a new one Now i am here with the 6 mistakes blogger should avoid while writing. I know there are many mistakes we make while writing posts but what to do? I though so long and just came up with 6. Well. here are the six supreme mistakes you should do often when you want your blog to be screwed.
1. Don't write about your dog, girlfriend or kid: Well i have no problem if you write abot these if you have a Personal blog but if you really want to get more readers and more rank then forget about your so called 'love of life' while writing post. I personally feel so bored when i read a blog describing blogger's dog, his kids eye or what ios the weight of his kid. So writing more about your familiar stuff is a big No no. Dude, who cares if your girlfriend kisses like a Slut? So foget them and write your post.
2. Don't interrupt your writing with lots of links: If you are using lots of links here and there then forget getting good response from readers. Many links in the post seems blog so dirty and dirty posts are not so welcomed in the blogosphere. So avoid using lots of links in between your posts and help make your blog a eye candy.
3. Don't promote yourself: Who are you to promote yourself a lot in your post? A new Newton or you invented an atom bomb? You are just one in a millions user of blogosphere. So keep your attitude and story within yourself and STOP promoting yourself and your personal stuffs at the expense of readers.
4. Don't be boring: Yeah don't be boring like me or be ready to have no improvement like this blog. You better try to make your blog interesting by using good languages and nice examples. Entertainment with knowledge rules here so screw your boring articles and put some pressure on your head about making articles interesting.
5. No copy and paste: If you only remember this then be assured that your blog will have a long lifetime. Don't ever think that copying John Chow's article will make you the next John Chow. Just adding mo!re pages on your blog doesn't means you will have a great blog. There has been overwhelming increase in number of bloggers so from now onwards ONLY CREATIVE BLOGGERS CAN SURVIVE HERE. Copying only helps best in high school exam and if you want to do same on blogging, forget it! And even if you copy someones post the don't forget to give a link to the original post or you will have the worst nightmare ever. I was nearly screwed doing this but now i am changed.
6. Don't give your all attention on money: Nowadays many people are bloggers as they want to make some quick money but in real there is no quick money in internet unless you are click scam. Writing too much of sponsored post can also make you lose your readers. Many is not bad thing but if you want to make it big on blogging, money doesn't deserves all the attention.
Well this was my Polished post on the mistakes that should be avoid while writing posts and i know this must be the worst suggestion you ever read on internet. If so, i will be so happy if you Subscribe me
This is just a quick post to inform that i have changed the name of my blog from 'Third world chaos' to 'Blogged up'. I thought that Third world chaos was not a suitable name for this blog talking about blogging. So do you have any comments about my blog's new name or if you have some good name suggestion then please leave a comment here. Thank you all.
This post is an expanded post of What to do when you have nothing to post about. Sometimes we don't have topic to blog but we want to give new post to readers everyday. So what should we do at that time? Two options, first go to some other blogs and look for the content that may be USEFUL to your readers and write them in your own words and publish them and another option is write nothing at all. the second idea is harmful and the first one is even more harmful as it may not be whole correct thing. So I have third option, polish your old posts and republish it.
There may be some old good posts that haven't created any buzz they deserved. You can use them in this idea. You can examine why that 'Good' post didn't received good response or why that post was not success though being good? Then you can rewrite that post and publish it. I am sure your post will get the good response it deserved.
This doesn't mean that you can polish anything random and publish it. There are many things that should be considered when you are polishing your old post to make it new. First thing to consider is quality of the post and also should keep in mind if that post is relevant to current time. For example you have a post about Lindsay lohan entering rehab but you cannot publish that post now as it isn't relevant now. If you publish the post irrelevant to the current time, i bet you are going to be screwed. Another thing to keep in mind is the posts fruitfulness to your readers. If the post is not fruitful to your readers then there is no benefit of polishing and publishing it. And yes, the main thing you should keep in your mind is correct all the shortcomings and mistakes of old post when you are polishing it. Just copying your old post from the archive and publishing it will make no difference.
If your new polished post meets all the above criteria then you can publish that post now. Since you are going to publish your unnoticed but good post, it will be real treat for your readers and you too will meet will great response. I too polished my old post What to do when you have nothing to post about, corrected my old mistakes and when i published it, i was happy with the response. So when you have nothing to post about, polish your old post to get a new one.
You have been reading my wacky blog for so long, Blogger hacks, Blogger widgets and Blogging tips, that were the only things you have been reading lately here. But today, I want to take a break from it and want to thank all those who have been inspiration for me . I want to thank the great blogs of some nice bloggers that have been helping me lately to make my blog better and to get traffic for my blog. These are the blogs which were the source of my posts though I never admitted their name. I am sorry but I will fix that now. So at this moment I want to thank all those blogs who were there when I needed an blogging tips, when I needed a template and when I needed a topic to post. If you too are a serious blogger then bookmark all these blogs as these blogs are the best blogs on blogging and may be useful for you too.
1. Blogger Templates: A cool collection of templates with blogging hacks and ideas on HTML code. But his templates are not the main thing that makes me admire him. This man wants to make a healthy blogosphere and also promotes the blogs of immature like us. A link on his blog can change the future of your blog and I have experienced that. What I have leant from him is we should always make the blogosphere healthy and alive and that is the best thing about him apart from his great blog.
2. Trick and Tips tutorial blogger: A cool layout with coolest blogging tips and tricks, this blog rules. The never before seen blogger hacks and blogger tips with so much easy to understand and polished writing, you truly deserve a hallelujah brother! Readers, bookmark this blog if you want to change the way your blog looks.
3. Beautiful Beta: This is not the first time i am writing about this beautiful blog but since this is a thank giving post, i cannot forget han's blog. I really like my blogs new look and all the thanks goes to beautiful beta. The expandable post and many other blogger hacks that i use in my posts and blog is created by hans and I am really grateful for him for all the tips and hacks on blogging he gave.
4. Blogger University: How can I forget Annie now? A PR5 blogger Annie has the best looking blog on this blogosphere and the cool posts only adds scent on the gold. This blog too is the source of many posts of mine and I am so thankful to Annie.
5.Tips for new bloggers: As name suggests, this blog has got it all. tips, tweaks and hacks with a well written post. Tips for new bloggers is a must read blog for all those who want to learn some tips on blogging. This PR4 blog is real good if you want to learn about blogging.
6. Widgets for free: This blog is best when you are searching for free widgets. The cool widgets about blog promotion, blog traffic and social networking can be easily found here for free. So bookmark this blog if you too like to use some good and cool widgets.
These are the all blogs I am remembering right now and I know I have missed some. But I wont forget to give them credit in some other post. So this was the post for today and i hope i have one more post to publish now.
08 may, 2008 will be remembered as the day when Country legend Eddy Arnold took his last breathe. The 'make the world go away' singer who was in the heart of many people and was the inspiration for many singers, left this world on 08 may, 2008 leaving his fans and family alone.
Thanks to Barb of Tidbits and treasures who posted an article about the death of Eddy Arnold and I got to read it. You can read Barb's tidbits about Eddy Arnold on her blog Tidbits and Treasures. Rest in Peace, Eddy Arnold. You will be missed.
Another blogger hack is here so i hope you are ready to welcome it with a drumroll. This tutorial is about creating float images that will always show on your blogs corner although you drag side scroll bar. See the example of floating image (The RSS image is used as floating image there). You can out anything on your blogs corner as your floating image, your dog, your own picture or anything. So here is the step by step tutorial on creating floating images on blog.
Step 1: Login to blogger dashboard then goto 'layout' and 'Edit HTML'
Search for ]]></b:skin> code and put the code below just above that code.
#float_corner {
position:fixed;_position:absolute;bottom:0px;left:0px;clip:
inherit;_top:expression(document.documentElement.scrollTop+document.documentElement.clientHeight-this.clientHeight);_left:expression(document.documentElement.scrollLeft + document.documentElement.clientWidth - offsetWidth);}
The bold text in the code is its position, you can keep it top or right or left anything as your choice.
Step 2: Now put the code below before </body> tag.
<div id="float_corner">
<a href="http://bloggingshits.blogspot.com"> <img src="
http://rabinsmith.googlepages.com/rss.png" border="0" /></a>
</div>
Here, "http://bloggingshits.blogspot.com/" is a link. And
"http://rabinsmith.googlepages.com/rss.png" is image url. You should change these with your own link and image url.
Now save and preview your blog. And if it worked then can i be blessed with a backlink to this post? Thank you so much, that was so kind of you.
If this blogger hack was helpful then you can try Adding Digg buttom to your posts!
These days I am trying to increase my backlinks and reviews about my blog so I am doing you review-I review program. So here I am today reviewing a blog of The midnight writer and i must say, I am not reviewing anything random rather I am happy I am reviewing a useful blog with cool posts.
The midnight writer attracts you at the first sight with its cool layout and cool color combination. Now read the posts and you will not be disappointed. The posts here are full of life covered with some great information. So if you want to take some rest from the blogging topic and read something thoughtful then The midnight writer would not disappoint you.
You must have seen recent posts widget for blogger. I am also using one in my blog. Recent posts widget are beneficial as they highlight your recent posts which may attract readers attention giving you some more page views. The recent posts widget i am talking now is not a stereotypical(That may be wrong word, but thats okay) rather you will find an interesting thing in this blogger widget.
The twist of this blogger widget is it contains a summary of your recent posts too. This widget not only highlights your recent posts rather it gives some simple idea of the post through the summary. If the summary is interesting, congratulations for some more views! This recent posts widget was made by Hans of Beautifulbeta. And yes, you shouldn't alter any codes of your template to add this widget as this recent posts widget can be installed on one click.
Get Recent Posts widget!
If this widget was likable then try Popular post widget for blogger too!
This may be a blogger hack or may not be a blogger hack but since in my view all the stuffs that comes with some change in the HTML code is a blogger hack. So if someone has any problem with me calling this post a blogger hack then read my shitty definition and jump from London bridge. And who doesn't, read rest of the post!
Tweaking images add some glamor to your blog. If compared to the normal images, the tweaking images looks like the most beautiful SLUT( i couldn't find a better word, sorry!). And another good thing is it is so easy to make your images tweak in blogger. Just change some HTML codes and your images starts tweaking. Tweak-inkle tweak-inkle little pictures, all i wonder what you are........ sing by yourself! So if you seriously want tweaking images like mine then follow the following steps.
Step 1:
Goto 'Dashboard' and then to 'Layout' and then to 'Edit HTML'. Don't forget to click on 'Expand widget templates'. And yes, backup your template before use.
Step 2:
Search for the following code in your template:
.post img {
padding: 4px;
border: 0px solid $borderColor;
}
Step 3:
Now paste the following code just below the above code in your template.
.
.post img:hover {
position: relative;
top: 1px;
left: 1px;
}
Now save your template and its done. Now to check if you are done or not simply place your mouse cursor above any image and see whether it tweaks or not.
If you liked this blogger hack then try Show only post title at Label.
Time for another blogger widget. This time the blogger widget is for the commentators. You can take this widget as tribute to the commentators of the blog. And this widget is called Top Commentator widget.
This top commentator widget was created by Blogger buster. This widget lists the name of the people who have given many comments to your blog with the link to their blog. This widget is also beneficial to your commentators as they will be listed on your sidebar if they are on the list of top commentators. I too used to left many comments(related comments, by the way) in many good sites which had this top commentator widget and yes, i got some good traffic from that too. I haven't used this widget now but i got good response from commentators when i used it before. This blogger widget is real cool widget to hang up in your sidebar.
Get this Blogger Widget!
If this widget was good then try other Blogger widgets like search engine widget
For more free widget visit Widgetforfree
Time for another blogger hack. And this time its not about expandable sidebar or adding social bookmarking widget, its about your emotion. Yeah, we are dealing with adding Yahoo emotion on your blog post section. Yahoo emotion? Yes, its true. Can't post your own emotion so took a help from yahoo. So here's how we make this blogger hack happen.
Adding Yahoo emotion in your blog post section is really easy, as easy as . Its just a matter of few HTML and what you gotta do is follow the instructions below. Oh wait, i forgot first make sure that you are using Mozilla firefox as you cannot move a step ahead if you are not using it. Step 1
Install Greasemonkey which is an firefox add on on your browser. Click here to get greasemonkey. After you install restart your browser so that add on will work.
Step 2
Click this script and then click install.
Step 3
Now its about your HTML code. Goto 'Dashboard' then to 'layout' and then to 'Edit HTML'. Now same OLD boring line "Please backup your template so that you can use it afterwards if anything goes wrong".
Now search for this code: ]]></b:skin>
Step 4
Now copy the following code just above the code in step 3.
img.emoticon { padding: 0; margin: 0; border: 0; }
Step 5
save your template and Congratulations! You made it, wooo!
To check if you are done or not , goto blogger create post, you will see the emotion in the tools panel of the compose tabs as in image below. If this blogger hack was good then why don't you try Control number of pages displayed in Label and archive page?
Blogging is just not a fun rather its chance to experience new stuffs and use them. This was a saying by one great person, the same person whom i see in mirror everyday. He he. Just kidding. Well, i am here today with a blogger widget that gives you many choices for web search. I saw this widget in Widgetsforfree first. Read the rest of the post to know much about this multiple search engine for bloggers.
This widget lets you search the internet using multiple search engines like Google, Yahoo, Wikipedia, technorati and lot more. The default search is Google but you can change it to all available search engines there from a drop down menu. You can also completely customize this multiple search engine widget in your choice by the help of the color pickers available in the site.
Get Multiple Search Engine widget.
If you liked this widget then why don't you try Currently online readers widget for blogger?
Another blogger hack here but its UPDATED. I just want to tell you that this Updated blogger hack about expandable content script for blogger is not so crappy like matrix reloaded rather it is cool and mostly, this blogger hack works woopie!
If you are unsure about the topic then i suggest you to look at my sidebar. Yes, expandable content script will help us create expandable content for blog like my sidebar. Just click on '+' sign of my sidebar once and you will be cleared about the function of expandable content script for blogger. But since this is am updated blogger hack, i first suggest you to read my older post on expandable content script, Create expandable sidebar.
Wait before you start calling me genius for creating updated expandable content script for blogger let me tell you that this post belongs to somebody else. Yeah the whole credit goes to Bloganol, who created this updated blogger hack. So i suggest you to check Create expandable script for blogger. I hope the link will help you learn the blogger hack and make your blog look stylish and neat.
For all those bloggers who are dying to get some traffic for their blog or are keen of being praised if their article is cool then hold your breathe, i have got a good news for you. today i am here with the information of a website that will help you get free traffic and some praise for your writing too.
Blogatiser is the revenue sharing website that allows you to submit your articles. The article you submit will help you to get traffic. If the people like your content then they can vote for you. And if you have more than 10 votes, guess what? Your post will be displayed on the Homepage. Cool, isn't it? And yeah, getting register here is also not that hassle as only few time is enough for you to register here. So take my little piece of advice here, sign up at blogatiser and do your blog a favor.
Oh, now i have started to love writing about blog widgets too. You know some blog widgets are so cool and are really useful for your blog. So today i am here with a new widget which enables us to see the readers which are currently online in your blog. So here is how you can add currently online readers widget for blogger. It is really easy to install this widget. What? Yeah, yeah more easy than searching Paris Hilton's upskirt pic in internet. With the help of this blogger widget you can easily see how many people are currently reading your blog. This is a cool and fun widget to use. so try it!
Get Online Readers widget for free!
If you liked this widget then try Coolest Popular Post widget for blogger too.
Blogging hacks, this word has fascinated me so much lately that almost everyday i post a new hack. Its hard to collect hacks but feels really good when you guys like it. Comment is the thing that inspires me a lot and thank you guys, i have been getting some comments lately. Today,s blogger hack is pretty easy. We can control number of pages to be displayed on the Label pages from this hack. So read rest of the post to learn this blogger hack.
You may find it conjusted when there are lots of post displayed in your Label age. You may want to control it on your choice. So what are you gonna do? From this blogger hack you can easily control number of pages to be displayed on your label pages. You can keep it as your wish, 5,10 or whatever. So lets do it step by step.
Step 1:
Sorry, same old boring line again. Goto 'Layout' then to 'Edit HTMl' and don't forget to click on 'Expand widget templates'. Please don't forget to back your template up.
Step 2:
Search for this code:
data:label.url
Now replace the upper code with this code:
data:label.url + "?max-results=n"
Where, "n" is the number of post you want to display in your label page. Just replace "n" with your choice of number and save the template. Now check on label to see if this blogger hack have worked on you or not.
This was today's blogger hack and i will bring you lots of other cool blogger hacks soon. Till then you can check other blogger hacks like Show only Post Title at Labels and Archive page or How to hide borders from header and images?
You never miss the lines about the role of Social networking sites for the traffic for your blog and how helpful social networking sites are for the promotion of your blog when you are getting advice for blog promotion and traffic generating ways. but are these social networking sites worth giving such priority?
Today, when i was wandering in the blogosphere, i went through a post which talked about the role of social networking sites on blog promotion. The site was Blospayu. This article was thought provoking and well written too which made me not to hit the back button. So what is your view on that? Are these social networking sites that useful for blog promotion? To be true, these social networking stuffs like Digg and reddit have not worked well on me. So i don't have much trust in these sites. What are your views, feel free to drop them. Oh, i nearly forgot, you can read Blogspayu's original article Social networking sites for blog promotion and make your view.
Here i am again with new blogger widget. And this time i am back with the coolest(read it thrice) popular post widget for blogger. You have been seeing lots of Popular post widgets lately(you can see one at my blog too) but this blogger widget i am talking about is most advanced and coolest one. trust me, you can enjoy lots of feature in this popular post widget then other widgets of the same topic. This widget gives your readers most popular and beloved content of your blog. With this widget you have the option to display your pages popularity based on year, month, week or today. The popularity of this widget is based on the comments,diggs,click through and backlinks.
Get Popular Post widget For Your Blog!
If you want another widget too then why don't you check RSS Feed reader widget for blogger.
You too may hate it like me but you have no idea how to remove it. I am talking about the full articles that comes in your label page. How would it be when your "Post title" is only shown except of full post in your label and archive page? Well, it will be great as your page will take less time to load and you will get another page view from your reader if they find your Post title attractive. So in today's blogger hack we are learning to show only post title at the Label and archive page.
Step 1:
Same old line, go to 'Layout' then to 'Edit HTML' and click on 'expand widget templates' checkbox. Now backup your template by clicking 'Download full template' so you can get your template back if anything goes wrong.
Step 2:
Search for the code below:<b:include data='post'name='post'/>
Step 3:
Replace the above code in step 2 with this code:<b:if cond='data:blog.homepageUrl!= data:blog.url'>
<b:if cond='data:blog.pageType != "item"'>
<h3 class='post-title'><a expr:href='data:post.url'><data:post.title/></a></h3>
<b:else/>
<b:include data='post' name='post'/>
</b:if><b:else/><b:include data='post' name='post'/>
</b:if>
Now save the template and you did it. This was real easy wasn't it? If you liked this hack then why don't you try to create a Drop down menu in your blog or Hide blog posts date,time and author.
There are lots more blogging hacks coming. So Subscribe me so that you will not miss any of the cool blogger hacks.
This question resembles to pain. You want your feed readers knocking on your blog everyday, you want to increase your post each day and you want to get good traffic from search engines. And these things are widely possible if you have many new content. But sometimes brain doesn't supports you to write new post. Actually brain acts dull during exams but sometimes we feel same while writing a post too. So what to do when you have nothing to post about? Hit your head with a hammer so that some idea may pop out? wait, I have got few ideas on it but I am not sure if you will like these ideas. So, read at your own risk.
1.Free articles site: Okay, if your brain is not working then why not to use others brain. There are loads of free articles in loads of free articles site. Just go to some free articles site like goarticles.com or ezinearticles.com and search for the topic that belongs to your niche. Now get the article, copy it and paste it in your blog. Congratulations, it was your new post today. But please don't ask me about the quality of the articles and number of blogs that have published the same article you published. And yeah a little piece of advice, don't use this option so often otherwise you are going to be screwed by your readers.
2. Blast from the past: Actually, this line belongs to John Chow. But who cares? He doesn't have copyright for this line. This is really cool idea when you have nothing to post. Just check your archive, look for one cool OLD blog post which still have some strength and republish it. Now you have a new post and nobody is going to know it. It will be lot good if you update the post like I am doing now (actually, this post is one of my old post which I updated before republishing it). Trust me, this is the best option.
3. Check your favorite blog or site: Oh my gurus have you got anything for me to publish now? Yeah this is the idea. Just knock on some of your favorite site or blog, look at the content you may be interested, write it in your own way and publish it. This way you will get a new post without lots of time consuming research. My post about Add Digg button to your post and create a drop down menu too lies in this category.
4. Promote other bloggers: Okay, you don't like any of the upper options then why not make this world a better place by helping other bloggers like you? Just pop into some blogs that have good content but not much buzz in the blogosphere, give their blog name with a link pointing to their blog in your post and publish the post. And its like total win-win situation as other fellows too will be promoted and if they are happy they can award you with the backlink. I hope you all know the importance of backlink. So why not try this option?
5. Have no Fear, You tube is here: Last option in my lost. When you are sick of all those upper ideas then You tube comes as a rescue. Just go to You tube, check some cool videos and publish it in your blog. But don't forget to add your own view about that video.
Well, this was my today's post and I hope it will help you when you have nothing to post about. But if it doesn't helps, subscribe Me!
After talking about blogger hacks like how to create drop down menu and how to add Digg button on your post, in this series of blogger hacks we are talking about how to create Drop down labels. Drop down labels? Yeah, no kidding, i swear of Peter's mom that this blogger hack is going to be cool and really great to implement too.
This blogger hack is not that hard to implement. It is just the game of few codes and you are done. So lets go to the point on how to create Drop Down labels. Firstly go to 'Layout' then to 'Edit HTML' and click on the 'Expand widget template' checkbox. i am again repeating the same boring thing 'Please download your full template first'. Okay, so are we done till this step? Okay then let's move forward.
Now look for the following code in your template<b:widget id='Label1' locked='false' title='Labels' type='Label'>
<b:includable id='main'>
<b:if cond='data:title'>
<h2><data:title/></h2>
</b:if>
<div class='widget-content'>
<ul>
<b:loop values='data:labels' var='label'>
<li>
<b:if cond='data:blog.url == data:label.url'>
<data:label.name/>
<b:else/>
<a expr:href='data:label.url'><data:label.name/></a>
</b:if>
(<data:label.count/>)
</li>
</b:loop>
</ul>
<b:include name='quickedit'/>
</div>
</b:includable>
</b:widget>
Now, replace the code above in blue with following code.<br />
<select onchange='location=this.options[this.selectedIndex].value;'>
<option>Select a label</option>
<b:loop values='data:labels' var='label'>
<option expr:value='data:label.url'><data:label.name/>
(<data:label.count/>)
</option>
</b:loop>
</select>
Now save the template and you are done. Wow, you did it man.
This was todays blogger hack. If you will use this hack then i hope a free backlink from you.
Caution: The ideas presented here will not bring you a great wind of traffic like in Myanmar. So if you are searching for HUGE traffic, press the back button. But if your blog has drought of traffic and you want some traffic to save your face then read the rest of the post. And yeah, i am talking about unsuccessful blogger here like I was some months back.
1. Get some traffic by commenting on other blogs : Did I said some? Yeah, some traffic but enough to end the traffic drought in your blog. This is the easiest idea. Just go to some blogs like yours, read the post (you can skip this step. Just reading the title can give you the idea about rest of the post) and leave the comment with a link pointing to your blog. Just keep in mind that the blog is not that big blog as big bloggers don't have that time to knock on the every blog commenting them. This is not my new 'freshly brought from poultry' idea. Big bloggers like John Chow too admitted doing this during his struggling age. Also these days there are widgets like 'Top commentators and Recent comments' in the sidebar of many blogs which will give you more chances of getting traffic as it is easily seen in the sidebar by many people. So try this and you will not be disappointed.
2. Get some traffic from mybloglog: I hope every blogger knows about mybloglog. If you don't, Just shoot your head with a hammer (shame on you!). So for what purpose are you using Mybloglog? For checking your sites stats? Or to meet the bloggers of similar interests? Please don't tell me you are looking for date in mybloglog. Its like searching quality in Lindsay Lohan's movie. He he. Have you ever thought that mybloglog can generate you good amount of traffic for you? I can say yes as mybloglog was the major source of my traffic before some month when I was treated like ghost in search engines. Confused? Well, I will say how.
First thing you got to do is build your own mybloglog community. The benefit of building such community is with one click you can send message to all of the members of the community and get some traffic. Some pain in head? Okay, let me explain. If you have 50 members in your own community then you can send message about your new post with a link to that post to all of them. I think nearly half of your community members will turn to your blog after receiving your message if your post sounds cool. Now if you have more than 200 members in your community then how much traffic would you get? Calculate yourself.
Its so easy to create mybloglog community. Follow this link to build your own mybloglog community and also read My mybloglog community building strategy to know how to get members in your community.
I am quite sure these easy way will really end your 'God, get me some traffic please' campaign and help your blog grow. But if it doesn't, I swear i will really be teary eyed for you. Just leave some comments.
Blogger widget, this is the first time i think i am covering about blogger widget and why not? You may have been already bored of my posts about blogger hacks. So for a change(read Good change) i am here with a post on blogger widget and this widget is a free RSS feed reader widget.
This RSS widget lets you add your own RSS. This widget is totally editable and you can change the look of the widget as you like. Adding this widget is so easy, Just select the title and add your feed and you are done. Its easy like searching Paris Hilton's upskirt in the internet.
Get This Widget Free!
This was my post on free blogger widget, you can still check the pages on blogger hacks like Disable right click on your blog and lot more on the blogger hack labels.
Sometimes you feel so low that you don't like to write a post about new blogger hack nor you like to keep sticking on mybloglog to see your traffic stats. It's a time to explore something and guys i am out with my untied seatbelt to travel the wild blogosphere. While exploring the blogosphere i went through a personal cum technical wordpress blog of Hari and here i am writing about it.
A black background with orange post background color and white colored links is what Aspiring entrepreneur blog is made off. I don't know why he calls his blog Aspiring entrepreneur but forget that because till now i don't know why i am calling my blog Third world chaos. College, education, free downloads are some of the categories covered by this blog and that too in a cool way. This was todays post about Aspiring entrepreneur and if you love to read personal blog then you can go for this blog.
In this todays post, we are talking about creating drop down menu. For your idea, a drop down menu is the menu THAT DROPS DOWN! Oh, this was the worst definition you may have heard about drop down menu but what can i do? This is the best i can give. <select onChange="document.location.href=this.options[this.selectedIndex]. <select onChange="document.location.href=this.options[this.selectedIndex] <option value="Links 3">Text 3</option> If you want the links to be opened in new window then replace below code: <select onChange="document.location.href=this.options[this.selectedIndex]. <select onchange="javascript:window.open(this.options[this.selectedIndex].
It's not hard to create a drop down menu, its just a trick or lets say hack. What you gotta do is just copy the code given below and put it in your page elements.
<option value="0" selected>Blog Archive</option>
<option value="Links 1">Text 1</option>
<option value="Links 2">Text 2</option>
</select>
The Blue text you see their is your Anchor text. So change it with your anchor text too.
Time for an example:
This is the code i used to create the Drop down menu you can see in my sidebar.
<option value="0" selected>Blogger Hacks</option>
<option value="http://thirdworldchaos.blogspot.com/2008/05/blogger-hack-add-digg-button-to-your.html">Add
Digg button on your post</option>
<option value="http://thirdworldchaos.blogspot.com/2008/05/blogger-hack-dont-let-anybody-copy-your.html">Disable
Right click on your blog</option>
</select>
before this code </select>
With this code:
Here i am back with a new blogger template after a long time. Be happy, you got a break from blogger hacks which i have been writing for so long. So today i am here with a free 2 column blogspot template and if you like it, you can download it as I have no copyright for this material! This 2 column blogger template is the product of Bloganol. This blogger template is called Rumble blogger template and i don't know why it is called so. I think you are now known about the look of this blogger template by the screenshot you saw. So, if you like it then click here to download free 2 column blogger template.
I am still unaware about the definition of blogger hack. In my sinple and innocent( he he) sense i think every thing related to the blogger codes may be called blogger hack. Was that wrong? Thank you smartass, leave your comment below about it then. Okay now lest go to the topic. today we are adding digg button on our post. And its easy to do that. Digg button on our post? Well, the button under my post title may help you.
This blogger hack(i said it, again) is not hard to implement. A digg button under your post in the way like my blog is just a few clicks away. So let's go step by step.
Step 1
I am making you bored again. Please download your full template so that you can have it like now. For that go to 'Dashboard' and then to 'Layout' and then to 'edit HTML'.
Step 2
Okay, i guess now you are on 'Edit HTML' section and have already backed your template up. Dont forget to click on 'Expand widget Templates' checkbox. Now search for this code
<p><data:post.body/></p>
If you want to put your botton on the top left like mine then replace the above code with this.
<div style='float:left; margin-right:10px;'>
<script type='text/javascript'>
digg_url="<data:post.url/>";
</script>
<script src='http://digg.com/tools/diggthis.js' type='text/javascript'/>
</div>
<p><data:post.body/></p>
But if you want to keep it at the top right corner of the page then replace with this code:
<div style='float:right; margin-left:10px;'>
<script type='text/javascript'>
digg_url="<data:post.url/>";
</script>
<script src='http://digg.com/tools/diggthis.js' type='text/javascript'/>
</div>
<p><data:post.body/></p>
You can keep experimenting with the codes to keep it on other parts of the blog too. If this post about Digg was good then please Digg me!
If you are still in search for the good blogger header images or if you want to change your geek blogger header image to the cool blogger header image then this post is for you. Today i am here with 30 cool blogger header images and i think you should take a look at it.
These header images were created by Dinesh of Bloganol, who happens to be my brother. Here i am promoting his work as you know 'A brother in need is the brother indeed'. That was about friends! I know, i just modified it for good use. Okay here i am showing you some of the cool blogger header images.


If you want more, why not visit Bloganol for 30 cool blogger header background images.
This blogger hack is useful, this blogger hack is cool and the best thing is this blogger hack is so easy to implement. Gentleman, welcome to the post dedicated on showing recent comments in sidebar.
Showing recent comments in sidebar is not a hard thing to do. Its just a game of code. So without delay i am onto game. To show recent5 comments on sidebar, you should copy the following codes in red and stick it in the template. After you save it, see your recent comments on sidebar.
<MainPage>
<h2 class="sidebar-title">Recent Comments</h2>
<ul>
<Blogger>
<BlogItemCommentsEnabled>
<BlogItemComments>
<li><$BlogCommentAuthor$> //
<a href="<$BlogCommentPermalinkURL$>">
<$BlogCommentDateTime$></a></li>
</BlogItemComments>
</BlogItemCommentsEnabled>
</Blogger>
</ul>
</MainPage>
If you are using this blogger hack then i hope i could get a link back to me.
So here is todays blohher hack. The usability or taste of using border depends on person. Personally, i don't like borders but as i said it depends on person and their taste. But this blogger hack post is just to make you know that it is so easy to remove borders in very short time. So you can use borders as long as you like and after you hate it, follow this post!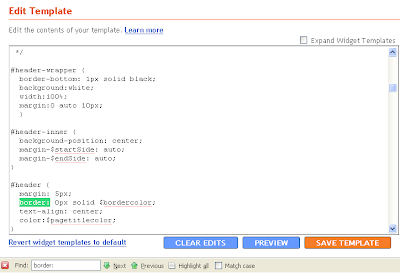 This may be the easiest blogger hack you find on this blog. To remove borders from header and images, go to 'Layout' and then to 'Edit HTMl'. From that search for the word "border" in the codes and delete it. You delete each and every "border" and you are done. The above image may help you in understanding this post more easily.
No this is not a blogger hack nor it is a blogging trick. Its just a simple blogging tip for those who are still creating tables to put their HTML codes inside their blog post as blogger doesn't directly accept HTML codes inside post area.. This was the same thing i was doing before few days but now I shouldn't have to spend my time creating tables but still i post HTML code inside my post. And this post explains how.
Some people may love to put their HTML code inside the table in their post. But i hate it and there is no second answer. So today i am giving the easiest tip which lets you to keep code easily inside your blog post. Quick Escape tool helps you do it. It changes the raw HTML to escaped HTML which is easily accepted by blogger and which can be kept in the post easily. This Quick Escape tool is really cool as it is less time consuming and easy to use also. So if you too want to get rid of creating boxes to put HTML codes inside the blogger post then Quick Escape tool is the Quick remedy for you.
If this tip was good then can i get a subscription please.
A question first. Do you love your content to a extent that you don't want anybody to copy it and paste it in their blog? Or are you strictly against plagiarism? If your answer is yes then this blogger hack is for you. This blogger hacks disable any right click on your content so that some newbie thief can't copy your content. Did i said newbie? Yes only newbie can be blocked from copying your content because professional thief will copy your content anyway.
Not many bloggers use this blogger hack to disable right click on their post content. I too havent done that as i am confident that nobody has faced such a bad day to copy this shit. He he. I am safe. Okay so lets cut the crap and go to blogger hack directly. What you gotta do to implement this is firstly goto 'Layout' and then click on 'Edit HTML'. Now find <body> code and replace it with the code given below.
<body onmousedown="return false" oncontextmenu="return false" onselectstart="return false">
Now save the template and you are done. Dont forget to see other blogger hacks too on the related posts.
I am sure you have seen lots of blog with a donation link on their sidebar. You may have wondered about keeping it in your blog. Well, i have wondered and tried it hard but finally i got it now. Here's how to put Paypal donation widget in your blog. But don't go further this line if you don't have a Paypal id. Just go on and sign up here!
It is so easy to keep this widget. Just cody the code below and change some values.
Change Blog Title to your own blogs Title and change Your Paypal email to your own paypal email.
<!-- The-Online-Quest Pay Pal Donation Form Code Start -->
<center>
<table width="143" cellspacing="0" cellpadding="0" style="border: 1px solid #000000; padding: 5px;">
<tr>
<td>
<p align="center"><b>Please Donate To My Blog</b>
</p></td>
</tr>
<tr>
<td width="145">
<form action="https://www.paypal.com/row/cgi-bin/webscr" name="_xclick" method="post">
<input value="Thanks for Your Donations - Blog Title" name="item_name" type="hidden"/>
<input value="Your paypal email" name="business" type="hidden"/>
<p style="margin-top: 0; margin-bottom: 0">
<input value="_xclick" name="cmd" type="hidden"/>
<!-- input type="hidden" name="amount" value="1.00" -->
<b>Amount</b> <p style="margin-top: 0; margin-bottom: 0"> <select name="Amount" size="1">
<option selected value="1.00"/>1.00
<option value="2.00"/>2.00
<option value="3.00"/>3.00
<option value="4.00"/>4.00
<option value="5.00"/>5.00
<option value="10.00"/>10.00
<option value="15.00"/>15.00
<option value="20.00"/>20.00
<option value="25.00"/>25.00
<option value="30.00"/>30.00
<option value="35.00"/>35.00
<option value="40.00"/>40.00
<option value="45.00"/>45.00
<option value="50.00"/>50.00
<option value="100.00"/>100.00
<option value="200.00"/>200.00
<option value="300.00"/>300.00
<option value="400.00"/>400.00
<option value="500.00"/>500.00
<option value="1000.00"/>1000.00
</select>
<p style="margin-top: 0; margin-bottom: 0"><b>Currency</b> <select name="currency_code" size="1">
<option value="AUD"/>Australian Dollar
<option selected value="USD"/>USD
<option value="GBP"/>British Pound
<option value="CAD"/>Canadian Dollars
<option value="CZK"/>Czech Koruna
<option value="DKK"/>Danish Kroner
<option value="EUR"/>EUR
<option value="HKD"/>Hong Kong Dollars
<option value="HUF"/>Hungarian Forint
<option value="JPY"/>Japanese YEN
<option value="NZD"/>New Zealand Dollars
<option value="NOK"/>Norwegian Kroner
<option value="PLN"/>Polisg Zlotych
<option value="SGD"/>Singapore Dollars
<option value="SEK"/>Swedish Kronor
<option value="CHF"/>Swiss Francs
</select>
</p>
<p style="margin-top: 0; margin-bottom: 0" align="center">
<input border="0" alt="Make payments with PayPal - it's fast, free and secure!" width="60" src="http://www.blogpulp.com/imagehost/images/5971708800.gif" name="submit" height="30" type="image"/>
</p>
</p></p></form>
</td></tr>
<tr>
<td>
<p align="right"><b><font face="Arial" size="1">
<a href="http://djyano.blogspot.com/2008/04/put-paypal-donation-code-to-your.html" target="_blank"> The-Online-Quest</a>
<a href="http://bloganol.blogspot.com/2008/05/add-paypal-donation-widget-on-your-blog.html">
Bloganol</a></font></b>
</p></td>
</tr>
</table>
</center>
<!-- End of The-Online-Quest Pay Pal Donation Form Code -->
<center>
<a href="http://thirdworldchaos.blogspot.com/2008/05/add-paypal-donation-widget-in-your-blog.html">
Add this Box to my Blog</a></center>
To keep this in sidebar, just change the few codes as suggested then click on add a new page element and in the HTML/JAVASCRIPT section as this code and you are done.
This was my post and hope you liked it. So why don't you be the FIRST one to donate me.
I am not sure why people use this blogger hack. I have never used it after all who wants to hide their name as the author of the blog. But this blogger hack is really useful for the ones who want to keep their blog clean in fact very clean by removing all the post date, time and name of author. So if you too belong to the same category then this blogger hack is for you.
First thing first, go to 'layout' and then to 'Edit HTML'. Don't forget to check 'Expand widget templates'.
Hide Post date
To hide the post date, find the code below and delete it.
<data:post.dateHeader/>
Hide Post time
This blogger hack says, to hide post time find the code below and remove it, NOW!
<span class='post-timestamp'>
<b:if cond='data:top.showTimestamp'>
<data:top.timestampLabel/>
<b:if cond='data:post.url'>
<a class='timestamp-link' expr:href='data:post.url' rel='bookmark'
title='permanent link'><abbr class='published'
expr:title='data:post.timestampISO8601'><data:post.timestamp/></abbr></a>
</b:if>
</b:if>
</span>
Hide Post author
To hide the name of author, why don't you find code below and delete it.
<span class='post-author vcard'>
<b:if cond='data:top.showAuthor'>
<data:top.authorLabel/>
<span class='fn'><data:post.author/></span>
</b:if>
</span>
Congratulations, now your post is time, date and author free. Don't let it be readers free!
If you are thinking to use this blogger hack then can i get a linkback please!
Still not sure if this is called a blogger hack or not. in fact i don't know the meaning of the word called 'blogger hack'. Its not that i have not searched in dictionary but i haven't found it. Maybe it was dictionary problem or mine problem while choosing the smallest dictionary from the store to save money for smoking. Well, jokes apart. So today we are talking about how to make the first letter of the post big and bold. If you are confused about what i am talking then the screenshot below may help you. Now i think you have got some idea about it. So without wasting our time lets go to the blogger hack.
Step 1
Go to 'Layout' and then go to 'edit HTML'. It is better to 'Download full template' for the backup.
Step 2
Copy the following code and paste it anywhere in the CSS stylesheet. It is better if you paste it in front of the closing b:skin tag.
.dropcaps {

  float:left;

  color: $headerBgColor;

  font-size:100px;

  line-height:80px;

  padding-top:1px;

  padding-right:5px;

  }
Step 3
If you are done with step 2 then lets talk about step 3. From now, put code below in every post whose first letter you want to make big.
<span style="gt;<span class="dropcaps">
Post First Letter Goes Here</span></span>
If you liked this post then can i get a comment from you or just a linkback if you use this?
Create label cloud for blog, this is not my first post on creating label cloud for blog. I think its second one and i also think the titles are also same but who cares? I am the son of Gurkha man, so i don't have the habit to look back. So i don't care if both the posts are same also. Oh wait, no its different post. Yeah the title are same but the content is different. And i must admit this is the easiest way to create label cloud for blog.
If you want to create the label cloud by playing with codes then the first post is good for you. Why don't you read create label cloud for blogger part1 first? Okay, now lets talk about this way of creating label cloud in blogger. This second one is real easy. You should not be worried about HTML here and that is real good thing if you are not HTML geek. This process is just like 1,2,3....... and done! Just sign up for Zoomclouds, create account and get a label cloud for your blog free! I think this hassle free way to create label cloud for blog is a great stuff if you are wanting for the easy way to add label cloud in your blog. See how the Zoomcloud looks like:
If you are using this tool then please link me too.
Ever wondered how many blog readers are currently reading your blog when you are writing posts or when you are arranging your blog stuffs? I think it really feels good when you see the number of people who are currently wandering in your blog pages. And i tell you, it's not hard or big game of code to be enable to see your current readers or lets say instant readers. It's just a minutes work and it's so easy too.
The site that lets us to see the online readers of our blog is called Freeonlineusers. As the name suggests, it enables us to see how many people are currently online in your blog. Just sign up for the account, customize the colors to display and finally paste the code in your sidebar and you are all done. If you want to see the trick implemented in my blog then just expand the sidebar called online users after the Label sidebar. It's easy and fun, so i hope you all will give just a single try to it.
I hope i can get some comments for this information!
Here is a new blogging trick and i swear that this is not my original post. The man behind this post is the same man behind Dynamicdrive. So if you got any problem with this script or it didn't worked for you then i am sorry, talk to Dynamicdrive first. He he, i am safe. Oh, we were talking about snow. So in todays blogging trick, we will create cool snow on our blog background. But i think firstly you want to check this demo.
This snow stuff works on the blog with dark background. So , i hope now that you have already seen the demo and i think some of you are even wishing to try adding snow on your blog. So here is the code to add snow in your blog's background.
<script type="text/javascript" src="snow.js">
/***********************************************
* Snow Effect without images-by Kurt Grigg at http://www.btinternet.com/~kurt.grigg/javascript
* Script featured and available at Dynamic Drive at http://www.dynamicdrive.com/
* Please keep this notice intact
***********************************************/
</script>
If this post was little readable then Subscribe me!
This is a new blogger hack. Well, i am not sure if its called blogger hack nor i think its new. But i had to start the paragraph with nice line so i said new blogger hack. You gotta problem with that? Okay, lets get to the point. Today we are learing(its learning, actually) to disable the right click on images. Disable the right click, what does it means? Oh, it means that the image can't be saved by clicking save image as which means your images cannot be stolen. Confused? I am sure you are. I am not good at english. So just read the whole post below and know by yourself.
Okay i think now you are known about the meaning of disabled right click and when do we need to disable right click on blog's images. So, if you think that thing is a thing you can too try in your blog then here is the code. Just paste the code below in the END of the page above end /body>tag and you are done. Congratulations, now your images are all safe.<script language="JavaScript1.2">
/*
Disable right click script II (on images)- By Dynamicdrive.com
For full source, Terms of service, and 100s DTHML scripts
Visit http://www.dynamicdrive.com
*/
var clickmessage="Right click disabled on images!"
function disableclick(e) {
if (document.all) {
if (event.button==2||event.button==3) {
if (event.srcElement.tagName=="IMG"){
alert(clickmessage);
return false;
}
}
}
else if (document.layers) {
if (e.which == 3) {
alert(clickmessage);
return false;
}
}
else if (document.getElementById){
if (e.which==3&&e.target.tagName=="IMG"){
alert(clickmessage)
return false
}
}
}
function associateimages(){
for(i=0;i<document.images.length;i++)
document.images[i].onmousedown=disableclick;
}
if (document.all)
document.onmousedown=disableclick
else if (document.getElementById)
document.onmouseup=disableclick
else if (document.layers)
associateimages()
</script>
If you think this post was just digestible then can you link me back please?
I have now added another blogging resource in my blog. From today you all can check google page rank from my blog. By entering the URL of the blog, you can check google page rank from this blog, instantly.
Google page rank is one of the important thing for your blogging journey. The blog with good google page rank can be marked as the good blog. So, this widget which let us to check google page rank easily will be really helpful if you want to check the page rank of your blog. So what are you waiting for? Immediately check google page rank from the widget below!
Here is another post dedicated to Ashop commerce's best shopping cart software and i cant help myself. This ecommerce shopping cart software is so cool that i don't feel to give up my valuable time to write a post about it. But today instead of giving the function of that ecommerce shopping cart software i am writing about the shopping cart features.
Ashop commerce's software has got many shopping cart features. I bet once you buy it, it will be worth every penny you spent on it. This world class easy shopping cart software does not needs an installation. It is loaded with loads of marketing tools like multiple currency display, affiliate program plug in,quality discounts, discount coupons and lot more shopping cart features. You can have many payout options if you use this shopping cart softwares. It accepts credit cards, real time payments, multi currency support and lot more. you can create your own payment option also. You will get fully optimized website with spider friendly URl's and Free Seo tips and tools. Those who are really scared about security, this cool shopping cart software can be the one. it has got real tight security features like super fast hosting,24*7 monitoring,multiple power sources,password protected SSL secured admin panel and lot more that is required for good security. The affiliate plugin containing affiliate program module, customizable commission structures, banner advertising system and lots of other stuffs is also a feature to watch in this software. These were the shopping cart features of Ashop commerce's shopping cart software. Highly recommended.
Now its so easy to make the buttons needed for blog instantly. With a help of a website you can make your own buttons within a minute and use it instantly. And the best thing about this make buttons online site is, it's Free! Makebutton is the site that helps us to make online button easily. Just select the format of button, give the text , choose colors and your button is ready. You can easily customize the appeareance of button. The button you can see in this post was also created within a minute. So now it's not hard and timeconsuming work rather it's just a minutes work to make button online and all the credit goes to makebutton dot com.
I have written a lot about the site Smorty and if you have been reading my blog for some time(which never happens!) then you would must have known that. But today i am not giving my old boring shits about smorty and what it does and how to make money from it. Rather today this post is dedicated to new(for me)branch of smorty and it is called smorty forum.
Smorty forum is the new blogger forum in the blogosphere. You can do all the stuffs you do in other blog forums like ask blogging questions, promote your blog, reply and all other forum stuffs. You will be up to date with all the latest news and happenings in the blogosphere if you are actively participated in this smorty blogger forum. There are lots of benefits in participating in this forum but Smorty forum needs your smorty's user id and password to log in so this may be the put off for some bloggers who don't have smorty account. But i think this smorty forum may be helpful for the bloggers like us who are helplessly trying to promote their blog. So let's welcome new blogger forum in the town by a drumroll. Welcome, Smorty forum!

